Quickstart
For the quickstart guide, it is assumed that users are attempting to upload Nektar++ datasets to the Department of Aeronautics (Imperial College London) database hosted at https://data.ae.ic.ac.uk.
Installation
With all python-based projects, it is highly recommended to create a virtual environmnent to prevent dependency conflicts.
For Linux and macOS:
python3 -m venv myenv
source myenv/bin/activate
For Windows cmd:
python3 -m venv myenv
myenv\Scripts\activate.bat
For Windows PowerShell:
python3 -m venv myenv
myenv\Scripts\Activate.ps1
On some systems, the Python executable may be py or python. Once the virtual environment is installed, the application can be installed using:
python3 -m pip install NekUpload
Setup
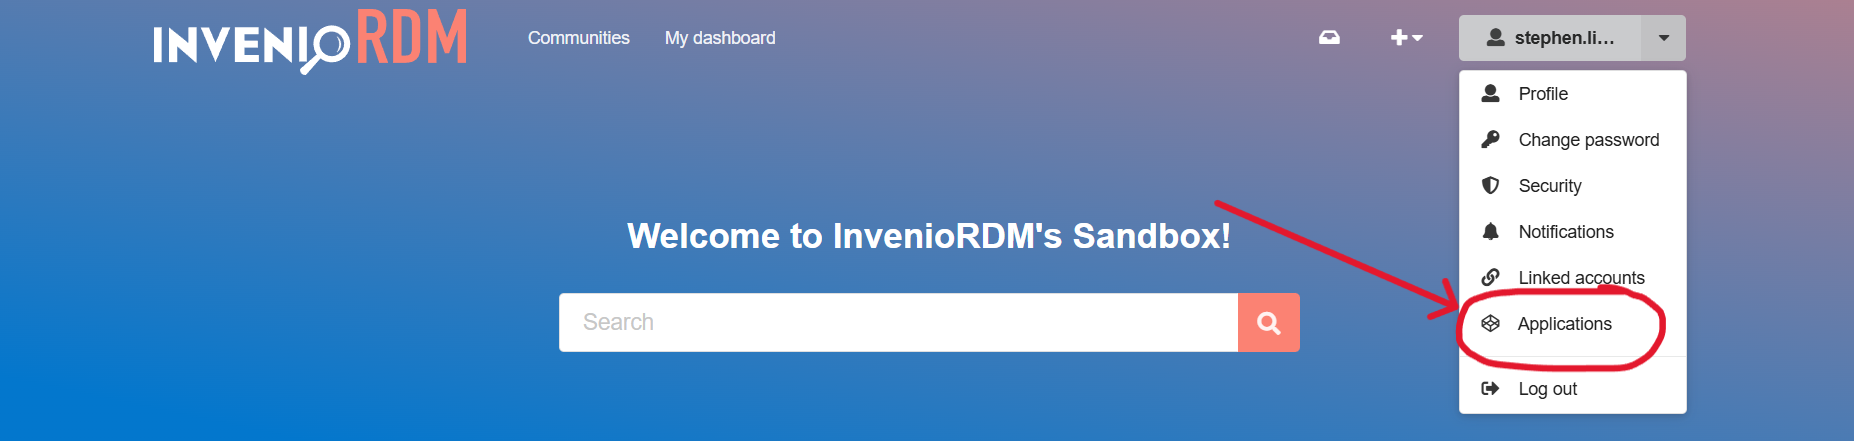
An API key is required to utilise this application. To create an API key, go to the online repository host (https://data.ae.ic.ac.uk). Login to your account and select your profile. You will see an option: Applications, as shown in the following image:
Under personal access tokens, click new token to generate an API key. Provide it with a name, and under scopes you should select deposit:write. Then create the API key.
Tip
If you do not see the option to select deposit:write under scopes, then you already have those permissions. Continue and create the API key.
You will have one chance to see your API key. Copy the personal access token and add it to your system’s environment variable.
For Linux/macOS:
export QUICKSTART_DB_KEY=<YOUR KEY HERE>
You can also add these to your .bashrc or other shell configuration files for persistence.
Tip
Adding API keys to shell configuration files can be useful if you need to run multiple times.
For Windows:
set QUICKSTART_DB_KEY=<YOUR KEY HERE>
You can use the System Properties dialog to set persistent environment variables.
Local Application
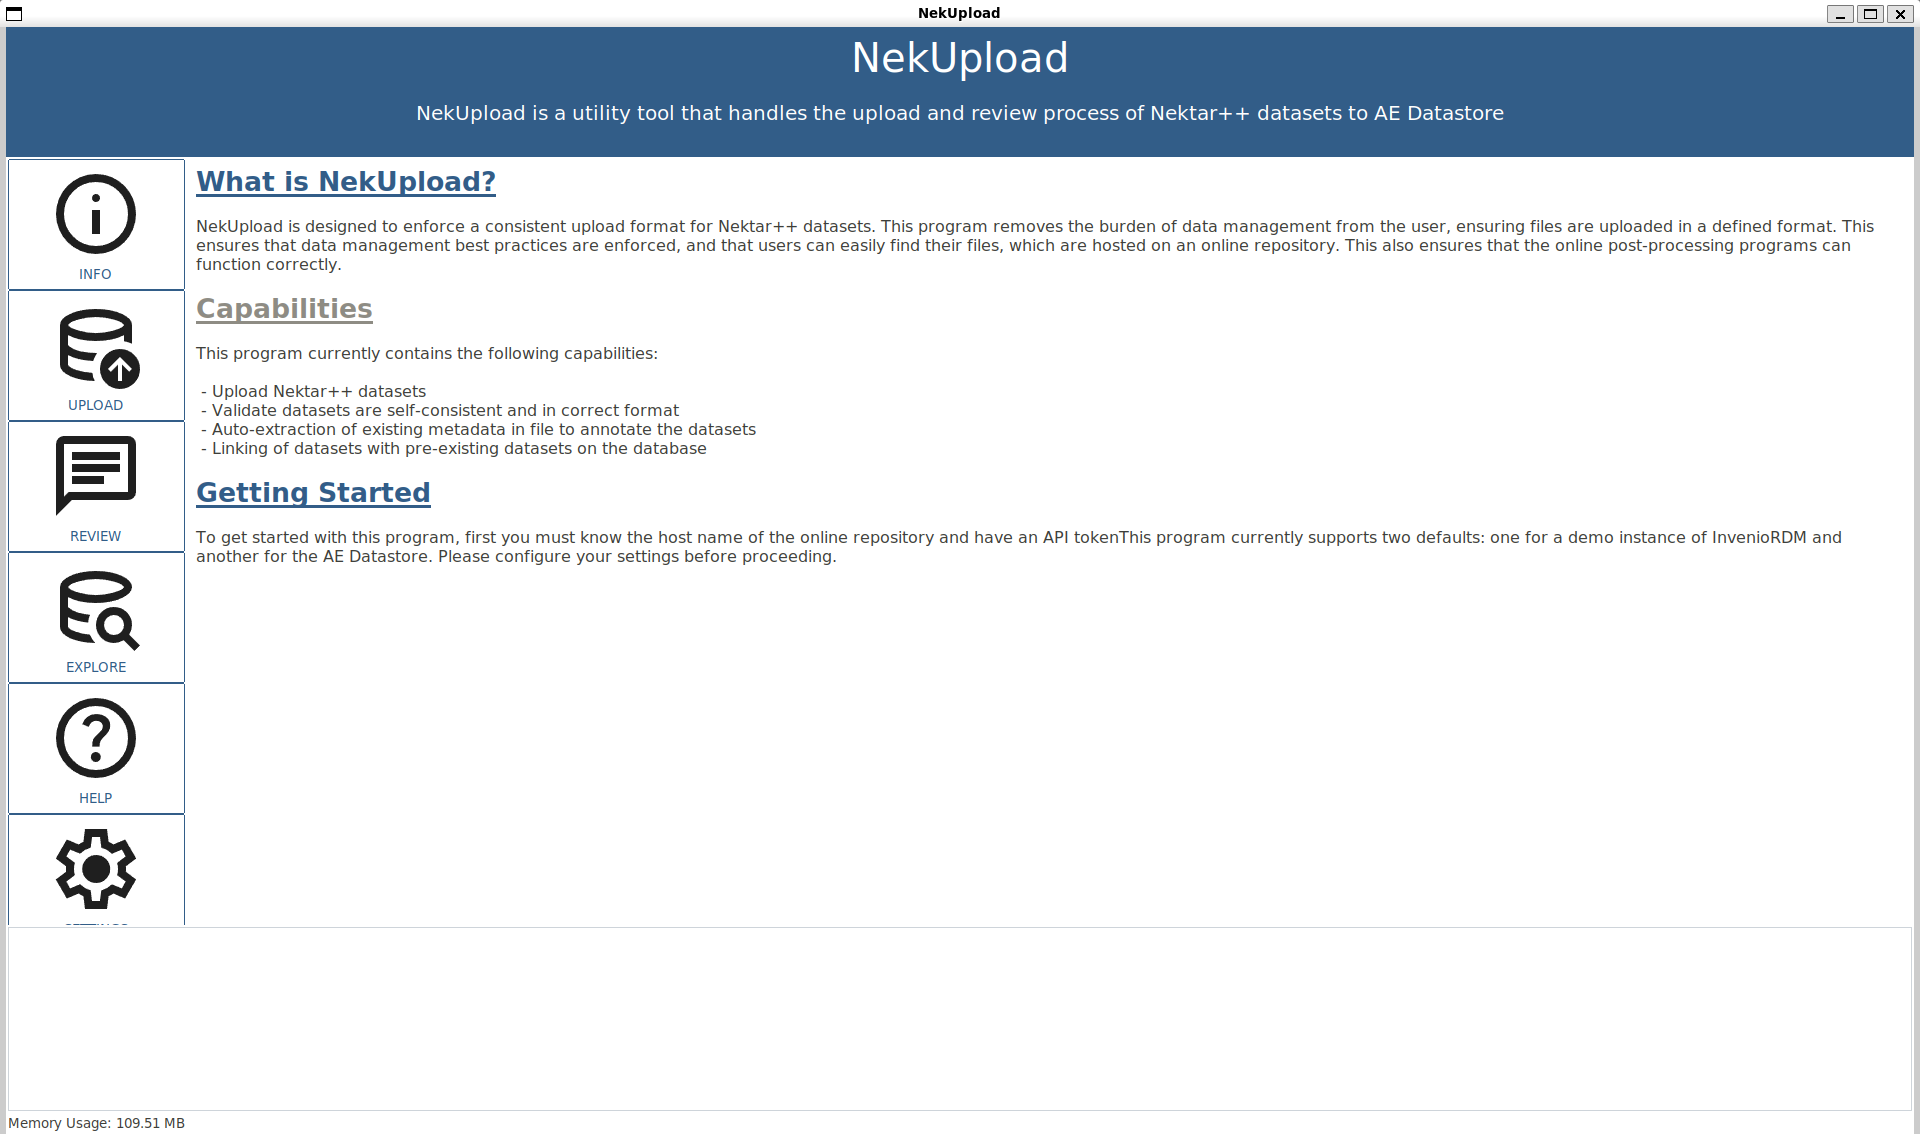
To execute the local application, run:
nekupload
This should open up the application:
Note
This app requires a modern version of TKinter, (versions >= 8.5). This is usually packaged with Python installations. The app may appear different in different environments, as it uses system native widgets.
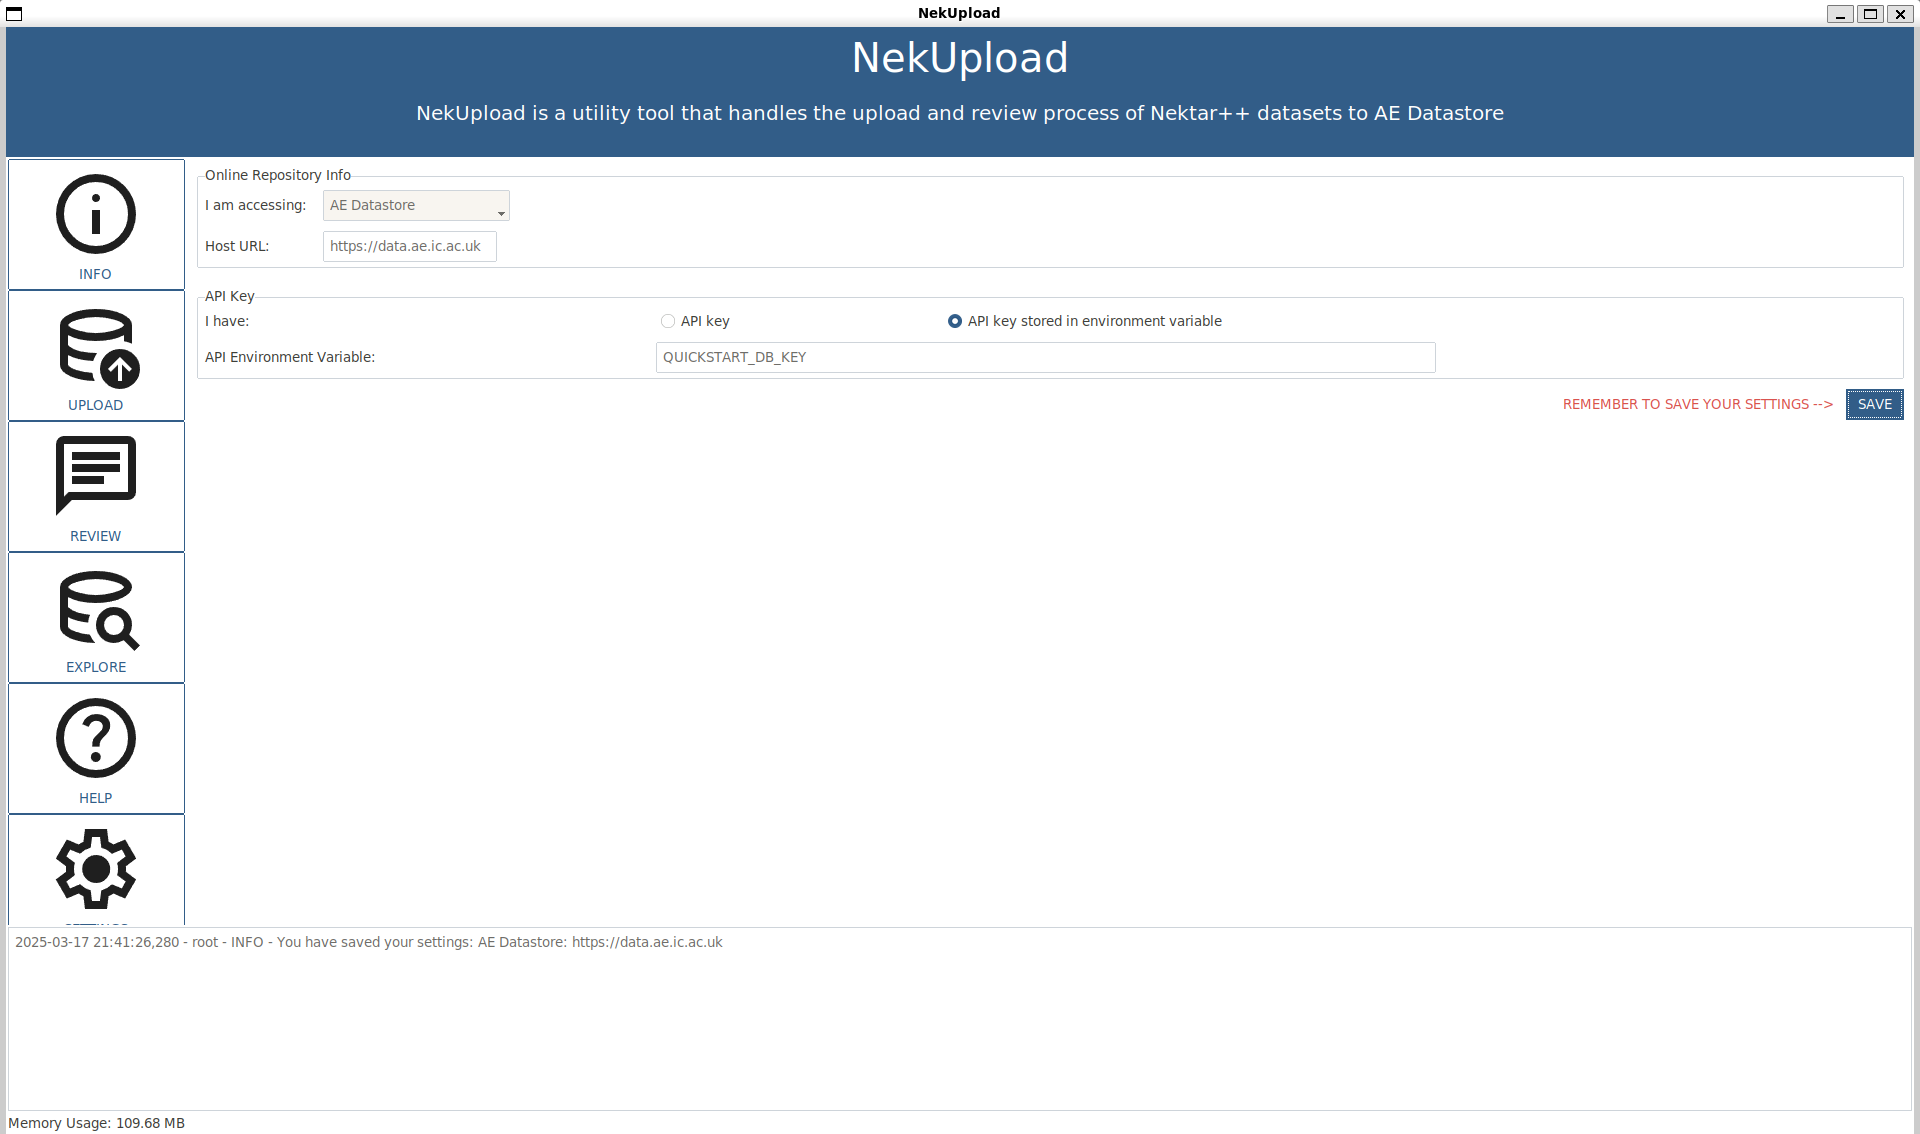
First navigate to the SETTINGS section. Select the API key stored in environment variable and enter the environment variable you used to store the API key. In this case, we are using QUICKSTART_DB_KEY. Make sure to hit save afterwards. The repostiory information should be AE Datastore, which is the default selection.
Warning
If you do not save, settings will not persist.
Once settings are saved, proceed to the upload page. Follow the steps on the upload form to upload your files. Once all fields are filled in, hit submit at the bottom of the page. Watch the terminal messages to be notified of failure (and reason of failure) or successful upload. You can check the online portal hosted at https://data.ae.ic.ac.uk to check that data has indeed been uploaded for successful uploads. Now wait for the admin approvals or any review comments.